


Wondering how to pack dishes and glasses for moving? Your dishes and glasses have survived countless family dinners, endless dishwasher cycles and even the scraping forks of your noisiest guests. But can they survive moving day?
Don’t let the stress of packing dishes and glasses for a move make you crack under pressure.
With the right supplies and a few professional packing techniques, you can help protect your dishes and glasses and pack them safely for the move ahead.
In the video below, our professional packing experts show you how to wrap and pack dishes and glasses for moving step-by-step.
Packing wine glasses too? Check out our separate guide and video on how to pack wine glasses for moving safely.
Step 1: Gather the Right Packing Supplies
 Before you start packing, make sure you have the proper packing materials on hand. Using the right supplies helps protect fragile items during transport.
We recommend using:
- Dish pack moving boxes (double corrugated boxes designed for fragile items)
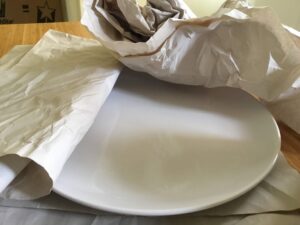
- Packing paper (Use white recycled paper, instead of dirty newspaper)
- Packing tape
- A marker for labeling
A strong box and plenty of cushioning make all the difference when packing breakables.
Step 2: Prepare Your Moving Box Properly
Start by securely taping the bottom of the box. Add extra tape across the seams and around the bottom edges for reinforcement.
Next, create a protective cushion by filling the bottom of the box with crumbled packing paper. This helps absorb movement during the move.
Step 3: Wrap Dishes and Glasses Carefully
Start with heavier kitchen items first, like plates and bowls.
Wrap each plate with packing paper and place plates vertically inside the box rather than stacking them flat. This professional moving technique helps reduce pressure and helps protect them during transit.
For mugs and cups:
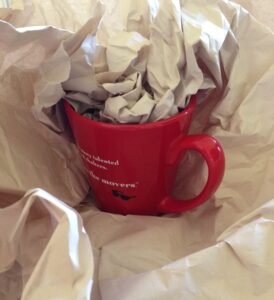
- Stuff packing paper inside first
- Wrap each item individually
- Place mugs on their sides to help protect the handles
When packing glasses, wrap each one carefully and place them vertically in the box. Fill empty spaces with crumbled paper so nothing shifts during the move.
Step 4: Fill Empty Spaces and Seal the Box

Once the box is packed, fill all remaining gaps with packing paper to keep everything secure. The goal is simple: zero wiggle room inside the box.
Then tape the box shut securely and label it clearly with:
- Contents
- Destination room
- “Fragile”
Don’t be shy about using extra packing paper. It’s recyclable, affordable and helps protect the items you use every day.
Need Help Packing?
Packing a kitchen can take time, especially when fragile items are involved. If you’d rather leave it to the professionals, NorthStar Moving offers full-service packing designed to help protect everything from everyday dishes to delicate glassware and heirlooms.
If you want to learn how to pack like a pro, check our full playlist of packing videos.